Proactive Compaction
for the Linux kernel
This feature has now been accepted and merged in the upstream kernel and will be part of kernel release 5.9. This post has been updated to match the upstream version of this feature.
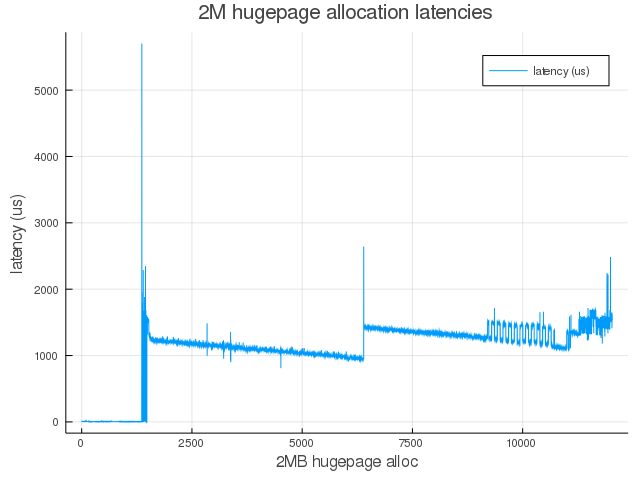
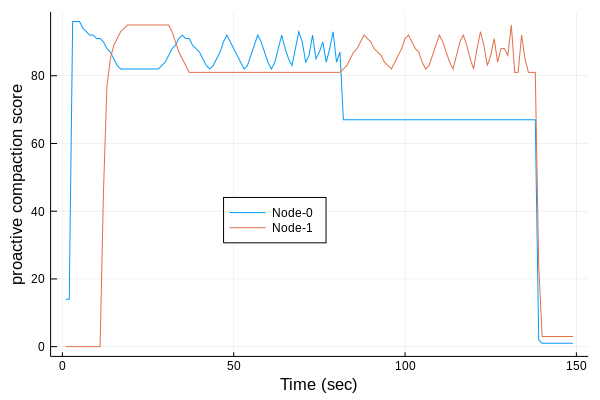
In my previous post, I described how on-demand compaction scheme hurts hugepage allocation latencies on Linux. To improve the situation, I have been working on Proactive Compaction for the Linux kernel, which tries to reduce higher-order allocation latencies by compacting memory in the background.
[Read More]